
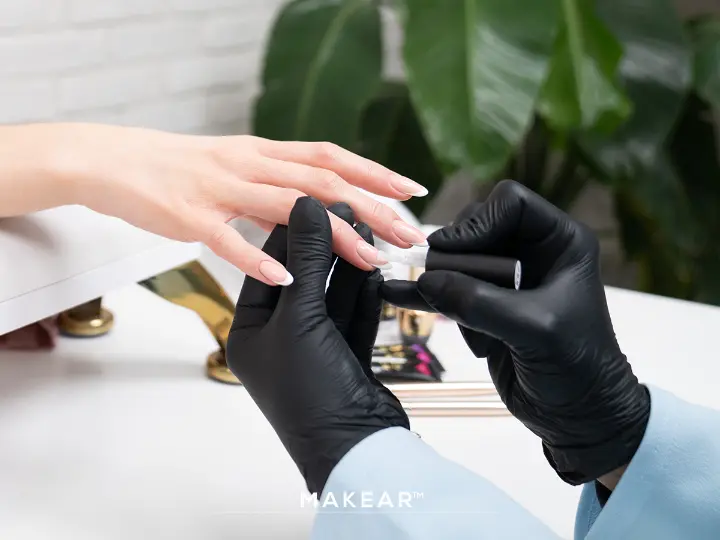
Gel polish has become the ultimate favorite in nail salons across the GCC because of its durability, high shine, and wide range of fashionable shades. Makear Gel Polish, with its premium European quality and salon-trusted formulas, is especially popular among professional nail technicians in Bahrain, Saudi Arabia, and across the Gulf region.
Yet, even with the best gel polish products, one challenge often comes up: chipping. Clients want nails that last for weeks, not just a few days. A chipped manicure not only disappoints the client but also impacts the nail technician’s reputation. The good news is that chipping is preventable—with the right products, techniques, and aftercare guidance.
In this blog, we will explore why chipping happens, how nail technicians can prevent it when using Makear Gel Polish, and the expert tips that ensure long-lasting, salon-quality results every single time.
Why Does Gel Polish Chip?
Understanding the root causes of chipping helps nail professionals address the problem effectively. Chipping usually occurs due to one or more of these reasons:
- Improper Nail Preparation
If the nail surface is not cleaned, dehydrated, or buffed properly, the gel polish may not bond securely. - Skipping Base or Top Coats
The base coat ensures adhesion to the nail, while the top coat protects from wear and tear. Missing these steps weakens the manicure. - Incorrect Application Technique
Applying layers that are too thick, flooding cuticles, or curing improperly can cause peeling and chips. - Client Lifestyle Factors
Some clients frequently expose their nails to water, cleaning chemicals, or hard impacts, which can accelerate chipping. - Poor-Quality Products
Low-grade gel polishes are more prone to cracking. That’s why using a professional-quality system like Makear makes all the difference.
How Makear Gel Polish Helps Prevent Chipping
Before diving into techniques, it’s important to note why nail technicians across GCC salons trust Makear Gel Polish:
- High-Quality Pigments: Designed for even coverage without streaks.
- Durable Formula: Flexible yet strong, reducing cracks and chips.
- Professional Rubber Base & Builder Base Options: These create a strong foundation for long-lasting nails.
- Glossy Top Coats: Available in classic shine or matte finishes, both ensuring long wear.
By combining these features with correct application techniques, chipping can be minimized or completely avoided.
Step-by-Step Guide to Preventing Chipping with Makear Gel Polish
- Nail Preparation – The Foundation of Longevity
- Clean the Nails Thoroughly: Remove old polish, oils, and debris.
- Shape and Buff: Smooth out ridges, but avoid over-buffing.
- Push Back Cuticles: This prevents polish from lifting at the base.
- Dehydrate the Nail Plate: Use a prep solution to eliminate oils that can interfere with adhesion.
Tip: A perfectly prepped nail ensures Makear base coat bonds securely.
2. Use the Right Base – Rubber or Builder Base
Makear offers two premium solutions for a strong foundation:
- Rubber Base: Flexible and self-leveling, perfect for natural nails and clients with slightly weaker nail plates.
- Builder Base: Provides extra strength and structure, ideal for extensions or clients who want added durability.
Tip: Always apply the base coat in thin, even layers and cure fully under a professional UV/LED lamp.
3. Apply Gel Polish in Thin Layers
- Shake the bottle gently before use to mix pigments.
- Apply thin coats—three thin layers last longer than two thick ones.
- Seal the free edge (the nail tip) with every coat to protect against daily wear.
- Cure each layer fully before applying the next.
Tip: Thin layers prevent bubbling, wrinkling, and premature chipping.
4. Seal with a Strong Top Coat
A Makear top coat locks in color, enhances shine, and shields nails from external stress. Options include:
- Makear No-Wipe Top: Glossy and durable for weeks.
- Makear Matte Top: Trendy, velvety finish with chip resistance.
Tip: Remind clients to avoid using nails as “tools” (like opening cans), which can compromise the top coat seal.
5. Educate Clients on Aftercare
Even the most perfect application can fail without proper aftercare. Nail technicians should guide clients on:
- Wearing gloves when washing dishes or cleaning.
- Avoiding acetone-based removers unless they’re having a professional soak-off.
- Applying cuticle oil daily to keep nails hydrated and prevent lifting.
- Returning for professional removal rather than peeling polish off at home.
Tip: Providing a small aftercare card with salon branding builds trust and encourages repeat visits.
Expert Tips from Nail Technicians Using Makear
Based on salon experiences in Bahrain, Saudi Arabia, and UAE, here are some insider tips:
- Always cap the nail edge—this single step dramatically reduces tip chipping.
- Avoid applying polish too close to the cuticle, as it can lift more easily.
- Double cure darker shades to ensure they set completely.
- Offer Rubber Base for clients with weak nails—it adds flexibility that prevents breakage.
- Use Builder Base for clients who are harder on their nails (such as healthcare workers or chefs).
Why Clients Notice the Difference with Makear
Clients often say they notice:
- Shinier Finish – That glossy, salon-fresh look that lasts.
- Stronger Wear – Even after weeks, nails look polished and professional.
- More Color Choices – Makear offers hundreds of trendy shades that appeal to GCC salon clients.
This combination of durability, beauty, and choice is why Makear continues to dominate nail salons in the region.
Final Thoughts
Preventing chipping isn’t just about the polish—it’s about using quality products like Makear Gel Polish alongside professional techniques and smart aftercare.
For nail technicians in the GCC, the formula for success is simple:
- Prep the nails properly.
- Choose the right Makear base coat.
- Apply thin, even layers of gel polish.
- Seal with a strong top coat.
- Educate clients on proper nail care.
By following these steps, nail technicians can deliver long-lasting, chip-free manicures that keep clients coming back again and again.